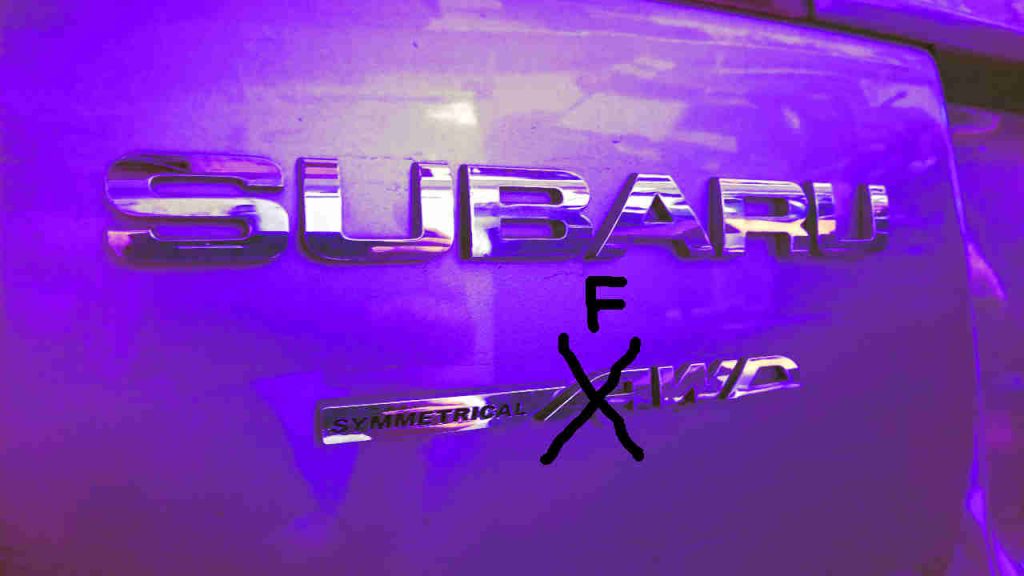
How to convert a 2010-2014 Subaru Outback to FWD. (AWD to FWD conversion, 6MT transmission, with pictures.)
Why would someone choose to ruin a perfectly good Subaru by eliminating the AWD system? In my case, I had a defective center differential, which caused binding on turns. By converting to FWD, you’ll get better gas mileage, and eliminate the need to have all the tires the same size. However, this modification will greatly decrease traction and drivability! Do this at your own risk! Subaru has a 50/50 weight distribution, and is not designed to be a front-wheel drive vehicle. This project was done with a 2014 Outback, with 6 speed TY751 standard transmission. If you have a 5 speed transmission (Forester, etc), the procedure is slightly different. I used parts from Bremar Automotive. I had to wait several weeks for parts to arrive, since Bremar is in Australia, and I am in Texas.
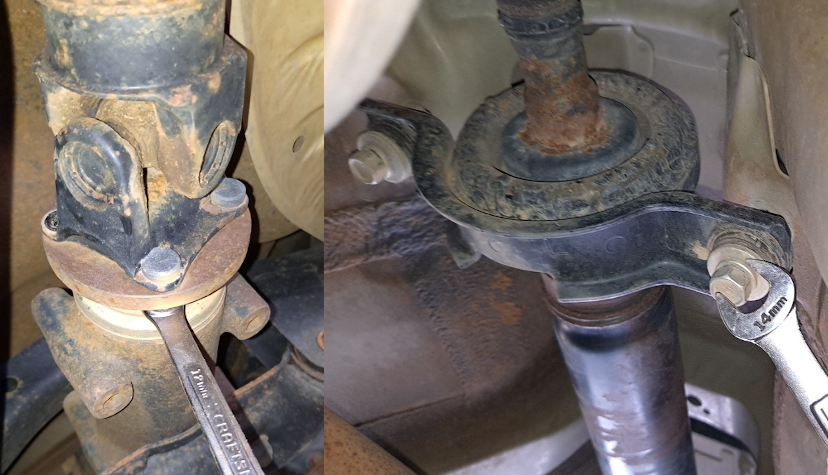
It’s not necessary to remove the transmission! Nor is it necessary to remove any roll pins or shifter cables (except with the 5 speed transmission). The only difficult part is removing the 27 millimeter bolt on the transmission output shaft. It’s not possible to get an ordinary wrench or socket on the nut. I used a Crowfoot wrench. Let me know if you figure out an easier way. Also, removing the rear cover of the transfer case requires a soft hammer, pry bars, and patience.
Before you begin, here are some special tools you will need to complete this project:
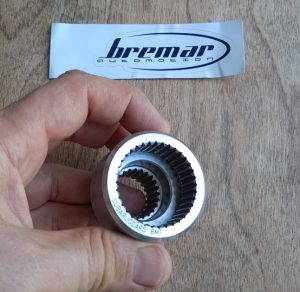
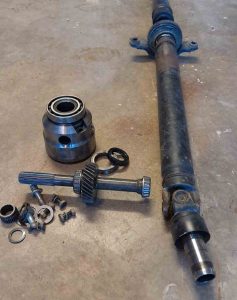
- A sleeve for locking the transmission output shaft to the front gearset. There are videos on how to do this by welding and cutting parts, but the sleeve makes it much easier. https://www.bremar3dscanstore.com/
- 27mm jumbo crowfoot wrench, 1/2″ drive. I used the Sunex 97327A https://ebay.us/PjMwL0
- 1/2″ drive air impact wrench.
- T-70 Torx (to remove the drain plug)
- Mosquito repellent (if you live in Texas)
To begin, you must drain the fluid from the transmission. The transmission and transfer case share the same fluid. I will capture the fluid in a clean pan to reuse later. You’ll need a T70 Torx wrench or socket.

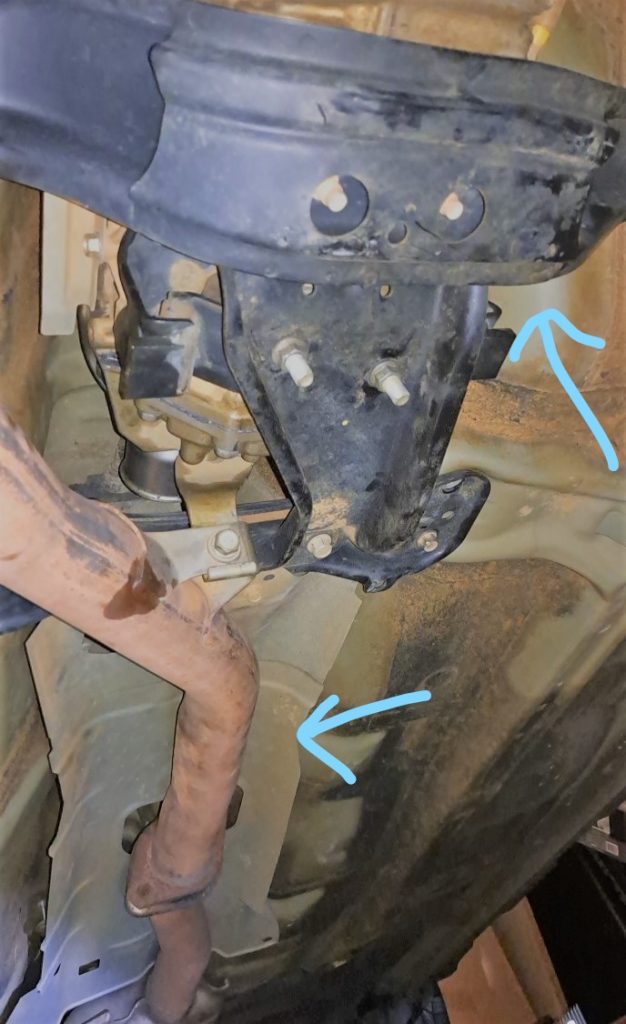
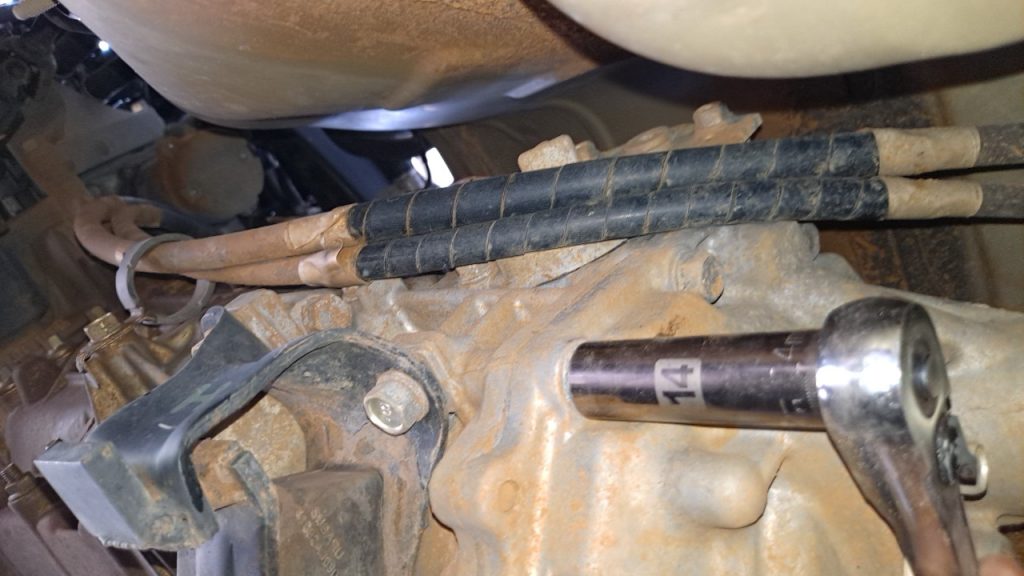
SAFETY FIRST! Make sure you’re supporting the vehicle with jackstands, or an appropriate floor jack that’s not going to fall. Remove the section of exhaust pipe that’s directly below the transmission. The anterior part (below the engine) has three 14mm bolts. The rear part has two bolts, 14mm and 12mm. In the center, there’s a single bolt.
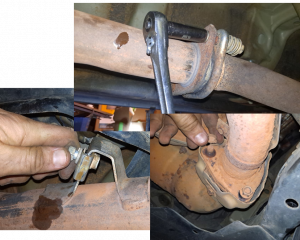
With the exhaust pipe removed, remove the brace supporting the transmission. The brace can stay in one piece, no need to separate it. Two 17mm bolts, and four 14mm bolts. Also remove the two nuts between the brace and transmission mount. This brace is connected to the shield between the exhaust pipe and driveshaft. This can all be removed together.
You may now remove the rear driveshaft. After this procedure is complete, the rear driveshaft is no longer necessary. The rear differential will also not be needed, however, I will leave it in for now.
Now you may remove the nine bolts on the transfer case cover. Also move the clip holding the shift cables and move the cables out of the way. With the 6 speed tranmission, it’s NOT necessary to disconnect the shifter mechanism, or remove any roll pins. If you have a Forester with the 5 speed transmission, you’ll need to remove the roll pin and remove the shifter linkage.
After removing all the 14mm bolts, you’ll need to use a mallet, or maybe a pry-bar or slide hammer to coax the rear cover off. There are two pins in opposite corners. Some oil will drain out when the cover comes loose. Once it starts coming apart you can use a screwdriver or pry bar, and work on the corners closest to the pins. I’ve left the shift lever in place, so you’ll need to work around it.
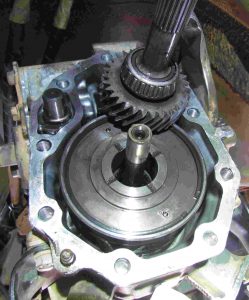
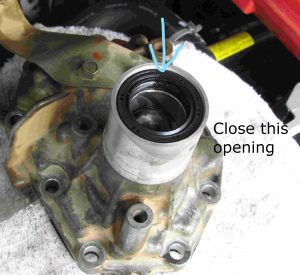
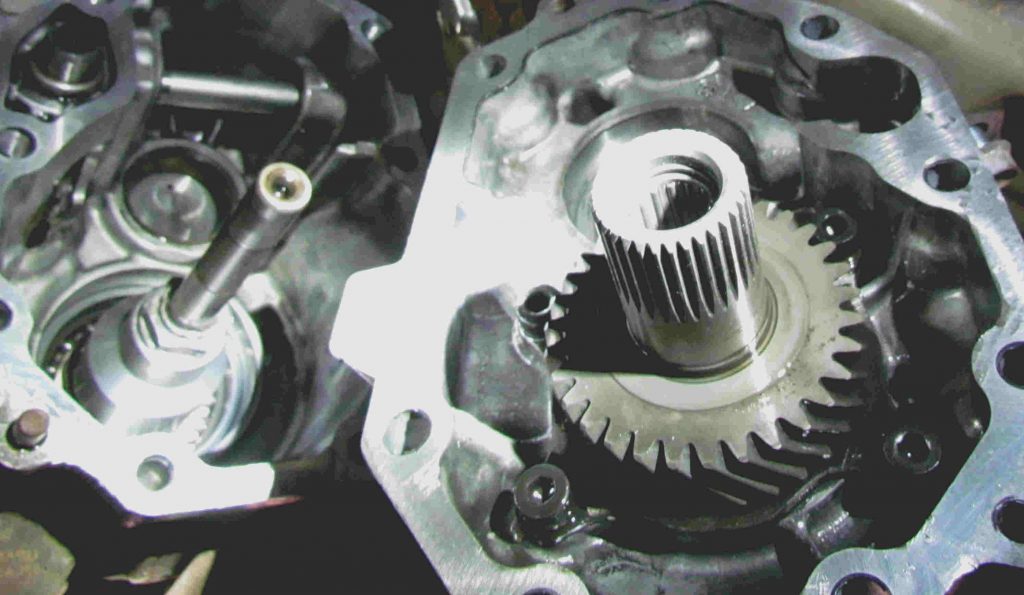
After removing the case, you will see the output shaft going to the rear axle (top right) and center differential (bottom). You’ll need to remove both of these. They should slide out easily. These will no longer be needed.
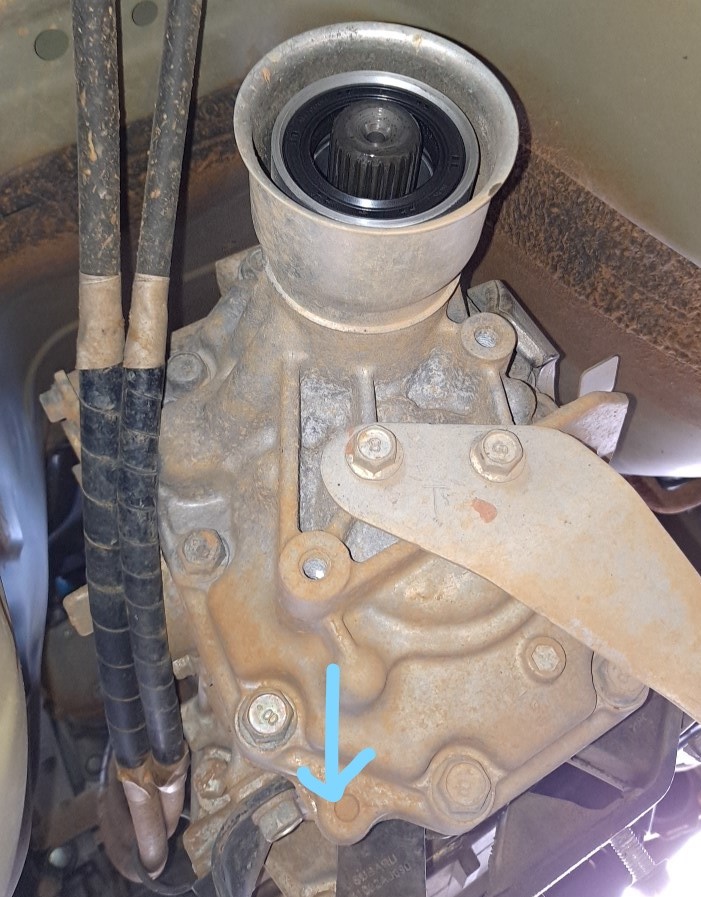
Bremar Automotive sells a custom backing plate. Without it, you’ll need to figure out a way to seal the opening where the rear driveshaft was, so that oil doesn’t leak from this hole. I removed the oil seal and found a plastic cap that was the same size, and sealed it with silicone.
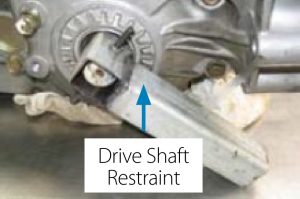
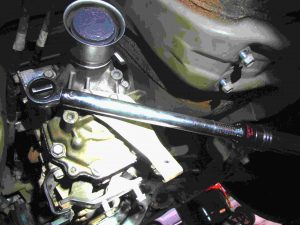
The next challenge is removing the 27mm nut on the transmission output shaft. I’m doing this with a Crowfoot wrench and a short extension. Also need a 1/2 inch air impact wrench to overcome the torque retention feature. If you have the front wheels of the car on the ground, the shaft will not be able to move. If the transmission is out of the vehicle, you’ll have to find another way to immobilize the driveshaft. Bremar recommends making a Drive Shaft Restraint.
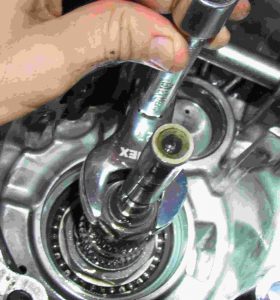
With the nut loose, remove the washers and spline adapter until you only have the transmission output spline, and the smaller spline. Insert the Bremer sleeve over these. You may need to turn the front wheels until the spline goes completely into place. Re-install the nut and a washer over the sleeve, and tighten well, using the torque retention tab. Loc Tite might be a good idea.
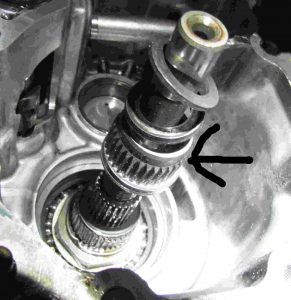
And now this is the finished product! The sleeve sends power from the transmission to the front wheels. The transfer drive gear will be left in place, but the center differential and rear shaft have been removed. We will now use oil-resistant RTV silicone to seal the rear of the transfer case.
Now you’ll need to reinstall the rear cover. The bolts should be torqued to 30 ft-lb. You can see the plastic cap I’ve used to seal the rear output shaft.
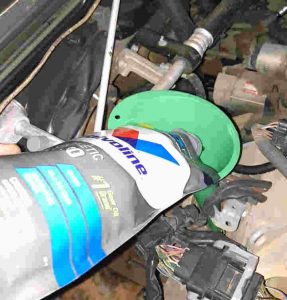
Now don’t forget to fill the transmission with fluid, and top off if necessary. Remove the air intake for easier access to the dipstick. The 2010 to 2014 manual transmission uses GL-5 limited slip gear oil, as recommended by Subaru. I’m using 75W90 fully synthetic. Make sure to use gear oil designed for hypoid gears.
Now re-install the transmission support and exhaust pipe. The following parts aren’t needed. Isn’t it nice to get rid of the extra parts that were adding unnecessary weight to your car? You can also remove the rear differential and CV axles, but leave the end of the CV axles in place to keep tension on the wheel bearings.
When you’re done, make sure to check the fluid levels.